Thursday, 27 February 2014

Look at the Stars

Hello and welcome to our inspiration page.

 My name is Clare and today I have a card to share with you. If you haven't guessed already I have a huge addiction to Sarah's 'Girl' sets. I use them on everything and I mean everything! From cards, tags,altered items,scrapbooking to Project Life!


Products used

Be Amazing - stamp set
Stars - stamp set

Here are my step by step instructions

1- Cut a square sheet of patterned paper and adhere to the basic white card.
2- Cut a rectangle sheet of pattern paper then create an aperture using a circle die.
3- Pop some sticky foam squares on the back and adhere to the yellow pattered paper.
4- Stamp the girl image from the 'Dream a little Dream' set and some eyes from the 'Be Amazing' set
5- Colour in the image using Promarkers (Tulip Yellow,Buttercup,Caramel,Sandstone,Soft green & Almond)
6- Cut the image out, pop on some sticky foam squares and place inside the circle aperture.
7- Stamp out the sentiment from the 'Stars' stamp set, again adding some sticky foam squares to the back before adding to the card.
8- Finally die cut some stars and punch some flowers. Small buttons from my stash were added for the flower centres.

******

Today is the last day of our current challenge so if you would like to be in with a chance to win some amazing prizes then pop on over here.

That's all from me today and thankyou for taking the time to stop by.

Hugs Clare


Wednesday, 26 February 2014

using mists part two.....


Nat here with the second instalment of using mists.....and today stencils!! 

Here is what I created with those scraps if card I misted on...all except the drippy mist spray...watch out for that in future creations. 


It's small but fits in my project life mash up of folders. And is almost a perfect start to project life :) 

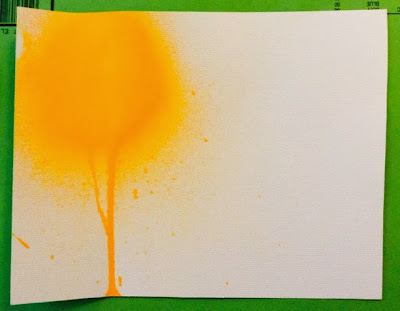
The background started with a fine orange mist. I sprayed some pink mist and let the hose leave some drip spatter. 

 I used the long colour block strip to doodle and cut a shape. I used Sarah's lattice background stamp and stamped a pattern onto the card. My next trick is to use one of Sarah's stencils - I picked the chevron - and instead of layering up texture paste I spread on paint! 


Yes, it's a knife....it works though :D 

 
I can't leave paint wastage is I used the remainder of the colour block scrap and flipped the stencil to print the rest of the paint. 


Watch out for that piece in another project too!! 

I finished the background using Sarah's circle stencil and blue paint...a nice contrast to the orange. 

So there we go, I look forward to seeing you joining in the challenges and using some mists!! 

Nat x


Tuesday, 25 February 2014

Be Mine!

Hi all,

Nicole here today to share an A4 digital page with you all. I have been making plans to make a digital photo book using the many photos I have for a while now. I thought it would be nice to have some digital layouts mixed in with just the photos so I have been trying to get into scrapbooking! I have used the adorable Be Mine kit for this page. I have worked with a photo we took on our wedding anniversary in July last year...just a tiny bit delayed :D

I off set the image on the top right corner and added in lots of 'layers' to give a cluster of embellishments effect. I love this cluster effect and it is quite easy to do in Photoshop too.


This kit is gorgeous for Valentines Day but also for any other time you want to celebrate love. There are also papers in the kit that I would use for birthday cards etc - so versatile! Thanks for stopping by today, hope you enjoyed.

Monday, 24 February 2014

Using mists.........

Hi creative peoples,

Natalie here with a tutorial (can I call it that?!?) on different effects with mists. 

I've used one of Sarah's mists (bought a loooong time ago) but obviously you can use any mist :) 

Now, before I start there aren't any creations.........the final product will be part of tomorrow's post :D 

I love blocks of colour!


To achieve this effect you will need: 

A pizza box 
(Or outside) 
Card
Ink spray 


You need to hold the spray at least 2cm away from the card and just go crazy and spray!! 

I like this technique as I can stamp on it, stencil on it, draw on it, emboss on it or even have a fine sprinkling of glitter stuck down with spray adhesive. 

I leave it flat to dry to avoid full curling but you can use a heat gun. 

Beware this will get you very messy :D 


Spray and drip!


This technique I achieved by holding the spray approximately 5cm away from the card and spraying repeatedly (about 5 times) in the same place. I held the card up and let the drips fall. I gently tapped the card against the cardboard box which created the spatter drips. 
Once dried, again, it's easy to stamp on, stencil on and is quite a nice effect. 

Slight spray

This effect I love , particularly when using a variety of colours! 


The trick to this spray is to go outside with a pizza box and spray from a distance of approximately 10cm. You'll get a fine mist produced which gently covers the card. 

This is all about confidence. There is no right and wrong when it comes to misting and spraying and there are no rules...except getting messy!!  So have a try on scrap paper and play around. Don't give up and don't worry what others will think! 

Stay tuned for tomorrow's installment from me ....... :) in the mean time crack out your mists and sprays. 

Nat xx

Friday, 21 February 2014

Fabric piecing and stamping

Happy Friday everyone! It's Ria here and I'm excited to share today's project.

Sewing is one of my favorite thing to do besides card making, so today I'll be showing both sewing and stamping joined together to make a home decor.

Below are the supplies I used. Most of these are already available in my stash just waiting for me to use them up :) Instead of paper piecing usually used on cards, I'm using felt and fabrics to piece the images on this decor.

I only use one stamp set from Sarah called Be Amazing. Love the simple outline of the lady image on this set, its simple lines would be easy to cut out fabrics.  


So, this is what I did.

I chose fabrics that don't have a very busy pattern on it but enough to highlight the main dress of my image. I stamped the part of the image directly on felt and on the fabric.


I cut the felt already on the below but see how I stamped the fabric? It's the wrong side up so the ink will not be show in front of the fabric, just my preference.


Here, I already stamped and cut the dress and leaves that I'll be using.


I then arranged the sentiment in place to see the spaces I need to permanently adhere all my pieces. See the other piece of red fabric on the side? I decided later not to use them as it overpower the other elements in the cut pieces.


I then stamped the Be Amazing using a stamp press. You can use your regular block too.


Oh and I used a fabric glue, Mod Podge to stick the pieces into the fabric base.


To finish off I added the arms by stitching them. 


And to add some texture, I stitched the leaves and using embroidery floss too.


After all the stitching is done, that basically sums up today's project, ready to be fixed on the wall or a framed decor in the table.


Thanks for stopping by and will catch up again soon. 

Wednesday, 19 February 2014

Bee Amazing

Hi everyone, it's Carol here today and I am going to share a card I have made using two sets of Sarah's stamps.

I love the whole honeycomb trend just now and couldn't resist the fab Hexagon Background Stamp and decided to use this along with the Be Amazing Girl Stamps to make a bee themed card.

Firstly, I stamped the background using Versa Mark ink and covered it with black embossing powder to make it look like a honeycomb. I heated it from behind, I find it gives it a much smoother shinier result. I did this twice, you will see why when you look at the picture.  I then stamped the gorgeous Be Amazing Girl onto white card, coloured her face and limbs in using promarkers and cut her out.  I used a bit of magickery on the Be Amazing sentiment so I could have an extra "E", hooray for post-it notes. I also used embossing powder on this and it looks really smooth and shiny.  

I stamped the girl onto the extra piece of embossed paper and cut out her dress, how funky does that look? And I opted to just pop some wee sequins in her beehive hairdo.

I used a honeycomb embossing folder on some Tim Holtz Core'dinations to add some more dimension.

Ingredients
Versa Mark & Memento Ink
Black embossing powder
Promarkers
Honeycomb Embossing folder from Stampin Up
Sequins and papers from stash

I hope this inspires you to bee crafty, thanks for popping by.

Tuesday, 18 February 2014

Clean & Simple Chevrons


Hi it's Lisa here and I've been playing with the 12x12 papers from January's A Few of My Favourite Things Kit.

Now don't get me wrong...I Love Love Love Sarah's papers but now they are 12x12 I sometimes struggle to get the larger patterns to work on a card as I usually make 6x6 cards or smaller! One option would be to take a little look at Sarah's fabulous selection of Digi Kit/Papers, as they can easily be reduced to a 6x6 format and the pattern shrinks too. However, I wanted to challenge myself to make a card using the largest pattern from the January Kit and make it work on a C6 card (10.5cm x 14cm).

Here is my card using Sentiments Stamps and the Black and White Chevron Paper:

CAS Birthday Card

Here's what you'll need:

Step by Step:

  1. Take an 8cm by 14cm piece of white card, mask the top third and stamp the remainder with various stamps from the Sentiments Stamp set. Remove mask and leave to dry.
  2. Attach this to two strips of the Black and White Chevron Paper and attach to the card blank using foam pads.
  3. Punch a star from some blue card. I used one of the journalling cards from January's kit, it has a heart pattern so I punch around a heart. Attach it using a foam dot and add some glitter glue to the heart. 
Close up of the Star


Don't forget to stop by tomorrow for more inspiration...I have had a sneaky peak at tomorrow's post and it's just Bee-autiful!!

Thanks for stopping by and keep coming back for more inspiration from the fabulous Hurley Girlies!

Lisa

Monday, 17 February 2014

Good Fortune

Hi Bloggers,

I'm here with a little post for you on behalf of SarahHurley365 and of course, the Hurley Girlies.

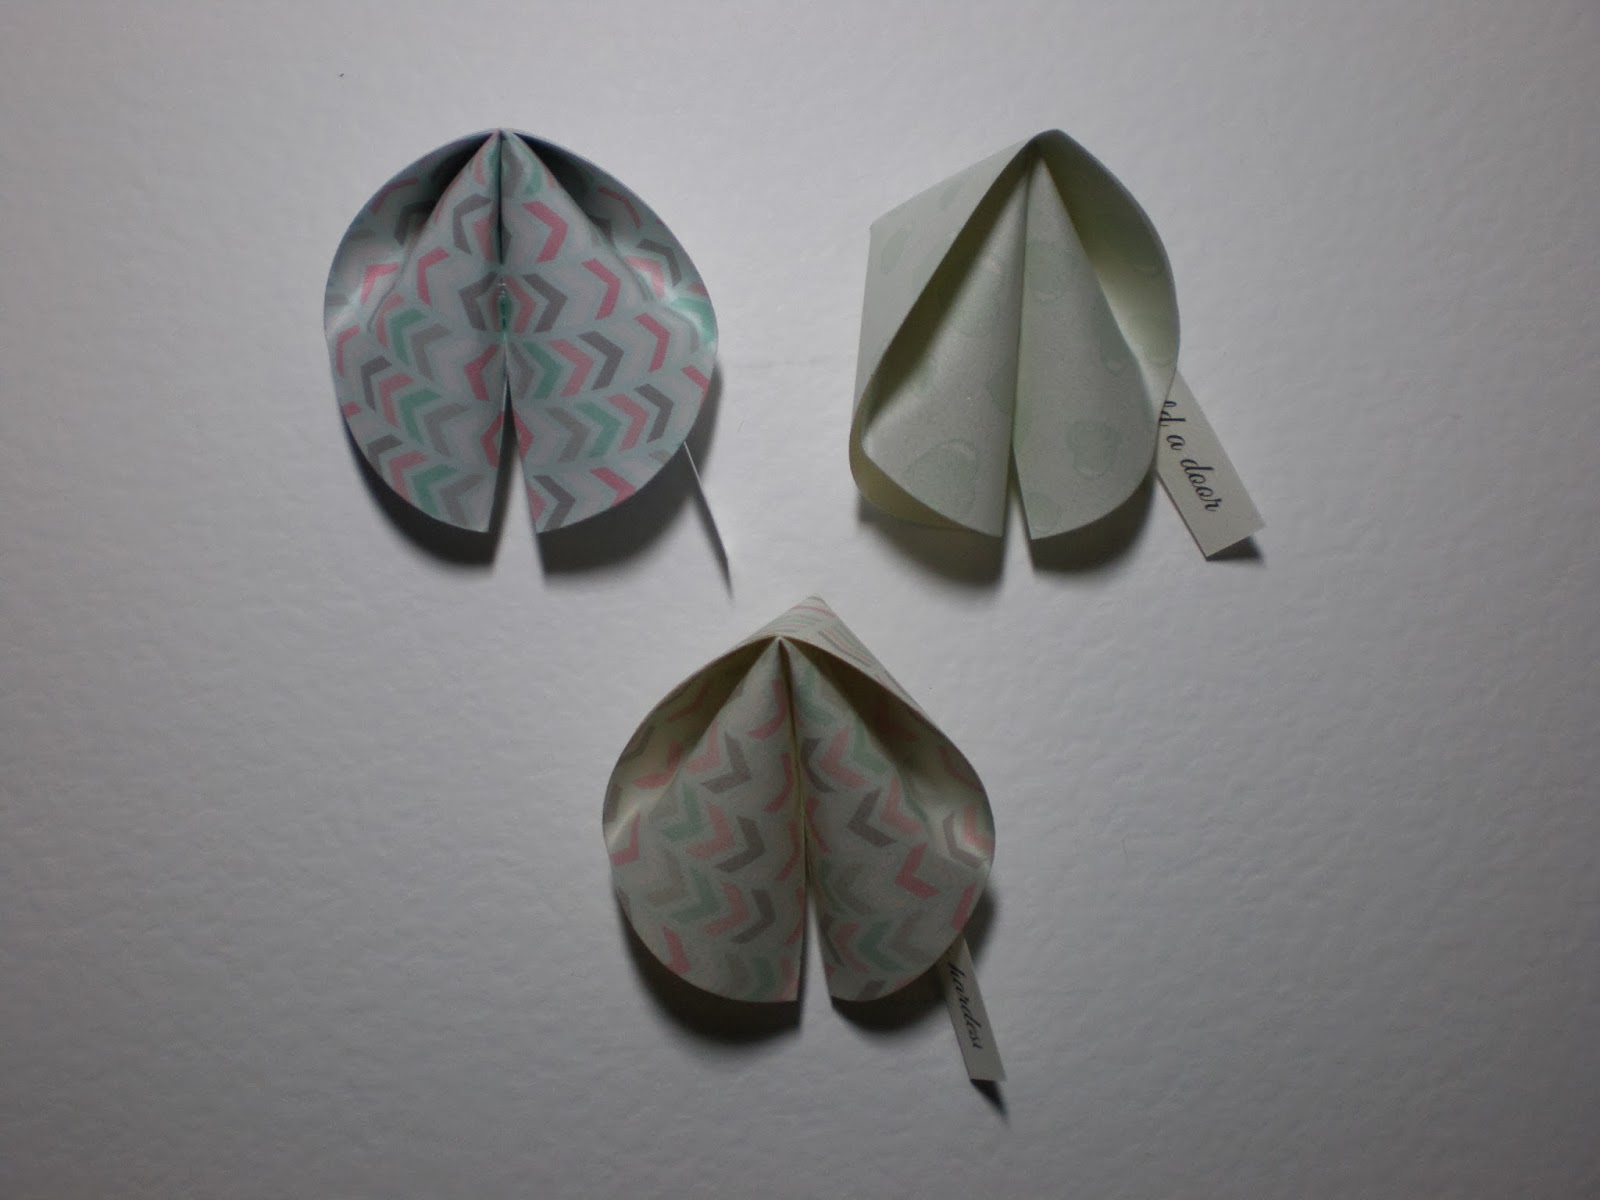
I recently came across the most brilliant template for making paper fortune cookies, and of course I just had to give it a go!!!

You will need:

Circles of pretty paper (I used Sara's Be Mine Digital Kit)
Sayings of your choice (inspirational or cheeky!)


This is the end result.  Head on over to my Blog for details on how to make!!!  You can find me HERE!

Sunday, 16 February 2014

Me & You card

Hello there everyone!  It's Ria here and I'm sharing another card project using a combination of different papers from Sarah Hurley.

First off is selecting random papers that complements each other. For this card, I used a selection from A Few of my Favorite Things Caught on Camera (this is one of my most loved kit plus stamps) and another from the 8x8 Paper collection. I also got another paper from the Curio collection.

I played around these papers and die cut them too for some fun shapes. The hexagon shapes somewhat mimics a quilt so using different papers is like choosing different fabrics too don't you think?


I embossed the sentiment from the Sentiments stamps with white embossing powder, and I also embossed the couple from the Expedition stamp set. What I love about stamping and card-making in general is I can mix and match stamps and papers from different collections without limits.

A closer look of the embossing, the silver sequin is also part of the Sarah's kit.

  .
The stamped star is from Wish Upon a Star Girl stamps.


This is it for today and thanks again for stopping by.


Saturday, 15 February 2014

Sarah Hurley Butterflies Nail Art!

Good morning everyone, hope you are well :-) I am here with one of my favourite discoveries using my craftiness with my love of nail art with Serif software, Sarah's Curio kit and some Inkjet Water-slide printer paper. I love nail art and have used water transfers before so I wondered if I could work out how to do my own and this is the result, I am very pleased :-) I used Serif software to play with sizing of the butterflies, and printed onto plain paper to test as the water-slide paper costs a lot more so you have to be ready to print without wasting it! Once I had my sizing right I printed onto the water-slide paper. I then varnished twice with acrylic varnish to make sure the ink wouldnt run when I placed the transfers in the water ready to apply. I left for 24 hours to dry. Then painted my nails a block colour which suited the transfer and did two coats. I had a shallow container with warm water and sorted the transfers into two size piles (I had four large, and six smaller) so I didnt mix them up by accident. I then put the large transfers in the water for 30 seconds, and used a top coat to make the nail surface tacky so it would cling to the nail. I followed this for all ten nails, and then painted a thick layer of top coat over the transfers. Then I added white polka dots with a nail art pen. Lastly I added another layer of top coat. All done!

Friday, 14 February 2014

Butterfly Hearts...


Hello it's Claire N with you today.

 Who is glad it's Friday then? What a week it has been, I do hope we find you all safe after that massive storm we experienced Wednesday. Living in South West Ireland, the severe gales hit us first and I was sure glad to be off the roads after the school run - fraught with a wind buffeted car, trees fallen in the road, and to top it all no electricity, water or phone signal at home until Thursday. Thankfully we are not flooded, and my heart truly goes out to those that are experiencing those challenges.

Without TV it was an early night for the kiddies so my mind turned to crafting (of course) but soon realised you may not have appreciated me posting my efforts of card making in the dark !!! So, onto what I was able make, and I delved into the latest of the monthly kits.
Sarah's 'Few of my Favourite Things' monthly kits have now been revised and comes with her super paper designs in the larger 12x12" size, as well as the usual journalling cards, embellishments, and of course (my favourite element) the stamps.

Sarah supplied us with 3 cheeky little hearts this month, and being Valentine's Day today I thought I would have a play with them. 


As you can see, when stamped in pairs (or threes for the larger ones) they make the most wonderful butterflies.


 Mix up the colours, experiment with different combinations, and maybe add a few solid lines with a black fine liner and you have a very different take on the traditional heart card for your Valentine.

It is a opportunity to remind you of this months challenge too, because this month we have asked that you choose just one shape as the main focus to embellish your cards. You can reach the latest challenge by clicking here, or finding the 'current challenge button' at the top of the page.


Thursday, 13 February 2014

Be Mine New digital kit

Hi folks it's Tania here with my DT spot. Today I have decided to use the new 

I don't know if you are aware but it is so simple to drop it into Craft artist and you have your very own digi kit.
You will need to drop the papers embellishements etc into the correct folder.
When you have finished using it to create your project make sure to save your kit and it will be there to use again.
I have created a card and then decoupaged images on to it, to create a wedding or anniversary card ,but would also be ideal for the love of your life. 
So Happy Valentine's day for tomorrow
 I have used the 3d decoupage button in Craft artisit to make the journal card look stepped.
 I cut out the top two layers with the love birds on and applied with 3d tape.
To create the embellishment I fussy cut the feathers and heart ot added 3d tape and finished off with glossy accents.

I added  glossy accents to the birds and little hearts and finished off by using an heart shape punch to add 3d element to the big hearts.
(I have added the grey paper and the lace from other elements I had)
Give it a try I love using digi kits , to create my own cards and the kit is also supplied with 5 SVG cut files to use on your own cutting machines.
So thats all from me today make sure you check out the shop for other digi kits.
Hugs Tania xx

Wednesday, 12 February 2014

Notelets

Hi! It's Sharon here again.
This last two weeks have passed by in a haze of night duty,migraines and a dose of teenager!Add to that a dodgy internet connection,a printer out of ink,running out of card and three weeks til pay day and crafting feels almost impossible!
I have a few catch up letters to send so I turned to the Snip 'n' Stick cards from Sarah's A Few of my Favourite Things kits. These were perfect for a few quick notelets and satisfied my crafting urge until pay day and supplies!


Thank you card


Hello notelet


Perfect for a quick note to my brother!


 Hi Mum


Note to friend wishing for a lottery win!

I really enjoyed making these and love the clean and simple look. Snip 'n' Stick- can't recommend them enough!

Monday, 10 February 2014

Steampunk Door Hanger

Hi All,

It's Nicole here today to share a project I made using the fabulous Steampunk Craft kit from Sarah's store. I really love this kit, it just is the perfect collection to make a fun project. I painted a chipboard hanger copper in colour and distressed the edges with some black paint too. I stamped all over it using one of Sarah's fantastic texture stamps - the crackle one. I then die cut some cogs from some of Sarah's papers to add to it.
You can see some of the detail up close here. I added some cheese cloth and skeleton leaves on it too. The key and flourish are from a grungeboard packet. I painted and distressed them also to match the project.
Thanks for stopping by today, I hope you enjoyed my project!!

Sunday, 9 February 2014

Smart Boy Scrapbook Layout

Hello there, Claireliz here, how are you today?

I'm loving the new 12x12 papers in Sarah's A Few Of My Favourite Things Kit & as soon as the postie delivered this months kit I broke into it & got cracking.

One of my favourite techniques is making shaped layouts & it's really easy, over the years whenever I've been in a craft shop I've kept my eyes open for 12x12 sheets of die cut papers or cardstock, when I get them home I grab an ordinary piece of 12x12 cardstock & draw around the die cut 12x12 onto the square 12x12, then cut it out, you now have a template, to make a smaller version of this for the background patterned paper, I again draw around the die cut piece onto a square 12x12 then cut it out, but, this time cut roughly one inch inside of the line of the shape making a smaller template. All you need to then is keep the templates somewhere safe & use them whenever the need to make a shaped layout takes you.

Once I'd cut my white cardstock & the blue polka dot patterned paper I started layering my other papers & embellishments onto the page, I'm a paper shuffler type of scrapper & I don't stick anything down until I'm happy with the final look...


Instagram prints are the perfect size photos for shaped layouts as you have a bit less space to work with. I layered the photo & a journaling card onto the turquoise paper & tucked a small piece of the orange heart paper under the turquoise so it peeks out. The little banners are attached with 3d foam pads. Finally I stamped a heart onto the border of the border of the photo using the stamps that are in the My Favourite Things Kit, added a bow to one of the banners & 3 cork dots to the journal card. As an extra finishing touch I doodled some stitching around the edge of the white cardstock & the orange & turquoise patterned papers.

Well that's all from me, thanks for stopping by, it's been lovely to see you. I hope I've inspired you to cut into patterned papers to create shaped layouts.

Take care & hope to see you soon.

xx


Saturday, 8 February 2014

Love is all around.

Hello and happy Saturday, it's Carol here with my showcase post. And this time I decided to play some more with my Cameo using some of Sarah's designs from the Silhouette Store.  There are lots of great designs to choose from, and the Valentines Day ones are just adorable.

I thought a "treat wheel" would be a different idea for a Valentines card, though it could easily be used for any occasion, or just when you think someone needs a wee treat.  I used the Heart Viewfinder as the main focus for my card and cut it out in two different colours to layer it up. I printed out a journalling card from the Oz Digi Kit and used it as my treat guide.  I thought mini love heart buttons would be a cute way of marking the wheel, and I used the Heart Arrow as my spinner, and added a love heart brad to it.  For the background I used pink chevron paper from Book Worm Digi Kit and printed it onto glossy photo paper to make is super shiny.  The Set of 3 Swag Heart Banners are so pretty that I used them as a background embellishment, though I only used two of them and pinned them down with the heart cut outs from the viewfinder.


I hope this inspires you to try something different this Valentines Day, or just surprise someone with a treat wheel card.

Thanks for popping by, have a good weekend.

Wednesday, 5 February 2014

Challenge 89 - All Embellishments Just One Shape


Hello Claire N here with February's challenge. It's my first time at hosting this challenge, and I would like you to choose just one shape and roll with it........by this I mean choose just one shape and use it as the main focus of all your embellishments. As it's valentine's this month, this theme is perfect for all your heart themed cards.  But equally I think any shape, whether simple or complex will be effective, so have fun !

                       We've got some fabulous prizes to give away 

              (please scroll down to the bottom of this post for more info!!)


I have chosen to use Sarah's butterfly stamps and before colourising my paper with stamping ink, I clear embossed the smaller butterflies so that they would resist the ink (therefore leaving them white). I then stamped and cut out the larger butterflies before decoupaging them over some self adhesive fabric. I have some more details over on my blog for you.
Here is what the rest of the team has created

For my project I used the Sarah Hurley Hexagon mask, some strips of old book paper, distress inks and pens to create a hexagon patterned tag. I then embellished this tag with hexagons cut from some Sarah Hurley papers. On these papers I wrote out a little poem I like. I had planned on adding some hexagon chipboard shapes but when I added the poem pieces I liked it as it was so made myself leave it be!


For my project I used Sarah Hurley's Expedition and Steampunk kits which I paired with wooden star embellishments


For my card I have used the stamps out of the monthly kit A few of my favourite things and repeated stamped them in black. I then stamped the stamps in red covered them with glossy accents and fussy cut them out,mounting them on 3d foam. I finished the card off with a sentiment from the Sentiment set


For my project I went back through my collection of Sarah's My Favourite Things kits & chose 3 shades of pink paper. I made a 5x5in square card & using my Sizzix I cut a heart in the centre of the front of the card, I die cut 3 different size hearts, 2 of each size and glued them together with a length of bakers twine running down between the two largest hearts, I attached the twine to the inside of the card to create this little swizzler card...


I used Sarah's Alpha Block Stamps to stamp the words love you, which I attached to either side of the swizzling heart with foam pads. So when you swizzle the heart it says love on one side & you on the other...

I've covered the inside of the card in pink cardstock too, for the front I die cut the same heart I used on the front of the card & just lined up the heart shaped holes before cutting the square for the card (neatly hiding the Sticky tape attaching the twine to the card). All of the little hearts are stamped onto the scraps of pink papers from Sarah's Odds & Ends stamp set & cut carefully with scissors, I doodled on some stitching then attached all of the hearts with 3d foam pads.


I just had to use stars as my embellishment, and decided to use a paper from one of Sarah's Few of My Favourite Things Kit, and stamps from Wish Upon A Star Girl Set ,Christmas Mail Clear Stamps and Star Stamps. I popped a wee silver star sequin onto the girls dress, which I coloured with promarkers and sprinkled some more onto the background too.


Using Serif, I played around with elements from January's A Few Of My Favourite Things Printabble Documented 365 Kit, to give my chosen image a border. I printed a sheet of the same colour as the border and punched out some tiny hearts, which have been mounted on 3D foam to give my card dimension. And you know I can't resist a bit of glitter!!!

More pics on my Blog


I chose punched out hearts in two different sizes for my embellishments. 

stamps - Be Amazing Girl
                   - Dream A Little Dream


The Hello sentiment is actually from Sarah's Documented365 For the Record journaling card. To give it some texture, I silver embossed the globe map from the Expedition stamp set (apparently one of my favorites). The circle shapes are punched from random  papers from Sarah's A Few of my Favorite Things papers and I also added some die cut vellum. 


The pin is from the Retro Flair pin badge.
  

Nat 


Circles for me. Everything from Sarah's most recent kit (except from the paint and alphas. I covered the hexagon mask in ink and used it as a stamp over the white paint. 


My background papers are from recent A Few Of My Favourite Things kit club packages with a heart cut out to hold smaller hearts inside. I suspended three little hearts on thin acetate strips above the card to make it look as though they were escaping.


I used the most recent 'A Few of My Favourite Things' Kit along with some stamps from Sentiment Stamps.


I used the chevron mask for my background (again-just love it so much!) and the Stars stamps to make this mini canvas to hang on my wall. I stamped the stars then cut them out,coloured them silver and glossed them before adding red cotton thread.


Enter our challenge and you have the chance to win the following

  First place - £10 voucher for Sarah's shop  
 Second place - a blog badge ( email Sarah)
Third place - a blog badge ( email Sarah)

This months special prize for one lucky winner drawn from entries using any of Sarah's 
products is.....


You have until the 28th February to enter....Goodluck!!!