Showing posts with label Claire N. Show all posts

Wednesday, 17 June 2015

July Calendar page


Hi there!

It is that time again for me (Claire N) to share the next page of the calendar that I, Jaine and Clare are all creating this year.
In December we will all collate our pages and each blog our entire calendar, and it will be so intriguing to see how different all three will look.


Today I have created my page for July. I have used the new papers from Sarah's re launch of her 'A Few of My Favourite Things' kit. I'm so pleased Sarah has decided to bring these kits back because firstly, I was running out of paper, and mainly because they are such beautiful quality, and I really do love the colour palettes that Sarah chooses. To definitely secure a kit you can subscribe to a delivery of a wonderful box of goodies every two months, or otherwise pop into the shop to see if there are a few kits available to buy on a single basis.

 To find out more you can follow this link


So onto my page, I decided to layer some of the new papers together, the colours of which remind me of ice-cream. I also chose a selection of stamps that reminded me of summer and holidays, and fitted into the ice-cream scheme. I stamped the images onto papers from the kit also so they co-ordinated perfectly.


Thank you very much for joining us today, I'm certainly in the mood for summer now and hope you are too.
See you again soon.

Supplies used

A Few of My Favourite Things Monthly Scrapbooking Kit contains scrapbooking paper, journaling cards, cardstock and a stamp
'A Few of my Favourite Things' May kit
Expedition stamp set
Doodle Home Stamps

Odds & Ends Stamp Set
Small square acrylic stamping block
3-in-1 craft glue

Sunday, 7 June 2015

Pom Pom Pets,Crafting with Kids

Hi There!
I've been looking forward to sharing with you today this little Pom Pom pet, going by the name of 'Mr Lovebird' in Sarah's shop, and 'Fluffy' in our home. Sarah's has a range of these Pom Pom Pets as part of her 'World of Imagination' Range of products, 

'where the sky is sky blue pink, the grass is glittery green and gum drops grow among the flowers. In your World of Imagination you can be anything you want to be, just grab your ticket and get ready for a trip to the fantastical world of make believe!'


Continuing on with the theme that saw us celebrate International Children's Day on 1st June, I (Claire N) thought it was an ideal time to show you that these kits are perfect for you and your little ones to craft along with together.
This was very much a joint project, and you can see from the photo's that my youngest (age 7) had a good go at getting this Pom Pom pet started.


I'm sure some of you will be familiar with the fact that the attention span of the youngsters can wane a little, and this is where, as a parent you can step in to offer a helping hand and speed the project along a bit.
I remember making pom-poms at this age too (though to be honest I cannot for the life of me remember why! I think I just made them because I could). These kits of Sarah's offer a much more sophisticated method of making, by supplying (in the kit) a plastic ring, to wind the wool round. I used to use roughly cut cardboard rings made from cereal boxes, did you?


Full instructions are provided in each kit, and once you get going it all comes flooding back. So, for that reason I haven't provided any instructions. I did want to offer you these photos though at key stages in the making process, to act as reminders or prompts along the way as points of reference (especially the newbies to pom-pom making).

The photo below on the left is how the pom poms looks, just as they are made, because you see from the finished photo (very top, and with Stephen below on the right) that it looks much 'neater'. The last job (before gluing on eyes, feet etc) is to give your Pom Pom pet a 'hair cut'. It is much easier to use the sharpest pair of scissors you own and trim the long rogue wool strand initially, before moving on the clipping very tiny amounts all over to even up the shape. It is very easy  to get very enthusiastic, and take too much off - so remember, 'less is definitely best' in this instance.


 I have a 13 (nearly 14) year old son also, and he was intrigued with the process of making this little cutie, and you wouldn't believe how tricky it was to get this little fluffy fella back to photograph for you to see...LOL!

If you have the opportunity to craft with youngsters I would urge you to take it, it is so much fun, and the look on their faces when they have achieved their goal is worth every minute.

Thank you so much for joining me today, I look forward to sharing my next project with you x


Monday, 1 June 2015

A Girls Best Friend - Pink, Beads and Party Dresses


Hi All, welcome to June, and International Childrens Day!

I'm Claire N, and I'm stepping into Carols shoes, just for the day. Today I have made a card using one of Sarah's Charm  Street Cuties, and a cute notebook that would be a perfect gift for a little girl to give to friend. I will show close up photo's a little further on, but I have taken the idea of an interactive shaker card and adapted it to suit this particular stamp.


To Make the Card
1) To begin, stamp the Cutie onto white stamping card, and colour with Promarker alcohol markers, and cut her out keeping very close to the stamped edge for the majority of the image. To prepare for the interactive, shaker area, increase  the border area around the skirt and legs,to hide the 3D foam and then use a craft knife to cut the skirt from the image.

2) On the reverse of the image, fix a piece of acetate to where the skirt was. Attach 3D foam across the reverse of the image, making sure that there is a completely sealed ring of foam around the skirt area of the image. This is where the small beads (glitter, sequins etc) will be  enclosed. Put the image and the cut out skirt to one side.

3) Prepare the background, by firstly creating a mask of the image, and placing it onto a piece of  13 x 9.5 cm white card. Using the banner stamp from the same set, stamp randomly across the background. Remove the mask of the character and colour the banner and background using alcohol marker pens.


 4) To construct the card,

  • Firstly use double sided tape to fix the skirt in position on the coloured background.
  • Remove the backing strips from the 3D foam from the top half of the Cutie and fix in place, aligning it over the skirt. making sure at this stage the skirt section does not stick.
  • Turn the background over and gently (so as not to crease) reveal the enclosed area and carefully fill the chamber with glitter, seed beads or sequins. 
  • Carefully remove the remaining backing strips from the 3D foam and lower the background into place. Ensure a tight deal has been made before turning over.
  • Mat the entire image onto silver mirri card, before attaching to the front of a pink card blank (11 x 15 cm).
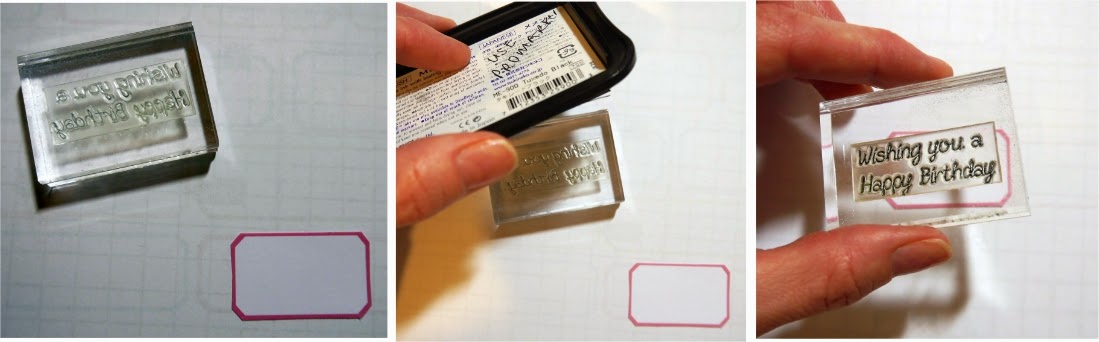
  • Lastly add a sentiment.


To make the Notebook

1)  Cut two 7.5 x 9.5cm pieces of pink card, and two pieces of white card. Attach a pink piece and white piece together , and punch holes evenly along one of the shorter edges. These will form the covers.

2) Cut a 6x8 cm piece of white card, and stamp the Charm Street Cutie off the centre. Using the same mask as before cover the image and stamp the cloud from the same stamp set as a background. Colour the images with alcohol marker pens, and mat onto a layer of blue card. Fix onto one of the covers, and this will be the front of the notebook.


3) Take four sheets of A4 copy paper, and measure out nine notebook pages per sheet, as shown below, the pages are 7 x 9cm each. Using the same method as before, punch holes evenly along one of the short edges of the pages. 


 4) Sandwich the pages with the pink covers, and bind the notebook by lacing a length of ribbon through the punched holes. Tie a double knot at each end of the ribbon to secure. It would be best not to bind the ribbon too tight, so as to allow the pages to turn freely.


I hope you have enjoyed my little tutorial today, we would love your feedback and welcome any feedback and suggestions of what you would like to see us make and blog about for you.

See you all again soon x


 Products Used
Charm Street Cutie Flower Girl Stamp Set
Memento Black Ink (perfect for use with alcohol marker pens)


Sunday, 17 May 2015

Create a Calendar - June (Claire)

Hi!
I'm back with you today (Claire N) to share the next page of my calendar with you. I am onto June, and I have included a reminder for Father's Day in my design.


I havn't included step by step instructions, because today my thought process in this design sort of developed as I worked. I'm sure that many of you also have sat down at your desks without a clear idea of what to make. The best thing to do in these times is to reach for your favourite coloured papers, perhaps favourite stamp sets, and from there it will flow organically.


I have photographed how I started out, so I can talk you through a little of my thought process.
  •  I knew I wanted to included the three smaller pieces of white card (to match previous months designs see LO's for february & march). 
  • I knew I wanted to include elements from Sarah's Curio Stamp set, so I stamped them with Memento ink onto white card so that I could colour them with alcohol markers to match when I needed them.
  • I had to incorporate the wording, so I stamped them using Sarah's Block Alpha stamps, again ready to cut out as required (You will notice there are two 'y' at the end of day. I restamped as the first wasn't a perfect image)


With the elements of my design listed, planned and laid out, I hope that can now see how my design came together. 
It is perfectly fine not know how your design will turn out when you initially sit down to create. There are days when you need to re arrange elements, move them about, and even discard and replace with new ones if necessary. These are the days that you can just sit, have fun and indulge yourself in all the time it takes for a creation to happen.

Enjoy, thanks for popping by today. 

Supplies used
Curio Stamp set
Block Alpha stamp set
Memento Black Ink
Sarah's Kit Club Papers

Thursday, 7 May 2015

Patchwork Paper Piecing

Morning!
Thank you for joining me (Claire N) this morning. I have a fun technique to share with you today that enables you to use up those little and oddly shaped scraps of paper that we all know we have either tucked away, or even on our desks.
Do you remember at school we were given bits of paper, some scissors and glue? Well, going back to those basics here we can create a unique background.

1) Gather your scraps together, a sheet of blank paper, scissors and glue of your choice.


 2) Start looking at your shapes, and with a bit of trimming here and there, start creating shapes that fit together to create a solid background. Glue down onto the blank paper, covering an area just a bit larger than the size of your required background. Don't worry at this stage about the edges not being square.


3)When you are happy with your 'patchwork', trim it down to the required size, and mount onto a contrasting piece of card to create a border. Attach to the front of the card blank and embellish simply - you don't want to cover up all those beautiful papers you have been coveting for so long. Here I have stamped Sarah's adorable little Elephant from her Personal Impressions- Baby Feet stamp set, onto a piece of pale design paper.


4) To finish the card, and enhance the patchwork style of the card, I draw in faux stitching onto each of the separate pieces, and onto the elephant too. Add a sentiment and embellishment of your choice (I had this rattan flag to hand, and the colour was perfect).

Thank you very much for popping by and seeing us today.For more ideas on how to use up little scraps and create gorgeous tags and toppers, visit Nicole's post called 'A Whale of a Time'


Supplies used
Design paper (watch soon for more information on new kits)

Friday, 17 April 2015

Create a Calendar - May (Claire)


Good Morning!

I'm (Claire N) sharing with you today my calendar page for May. I'm really pleased how this project is coming along. We are nearly half way through, and even now I am enjoying looking back over the last months to see my mood and style that has been captured.
I am creating the entire calendar, firstly to be used during 2016, and also with someone in mind to gift this too.


My inspiration for this May layout, was birthdays. May is the month of my Dads birthday, a talented amateur photographer.  I have been coveting these papers from Sarah's 'A Few of my Favourite Things Kits' from (literally) ages ago, yearly last year I think......hehe!  (keep a check on this link here, there may be some exciting news on the way soon, if you loved and miss these kits)
Do you do that, just keep papers without using them? I do, I get just as much pleasure from looking at them and re-arranging them, then putting away again.

 Anyway, I was compelled to use them today because they are absolutely perfect for any photographer. May is the month when Spring is in full swing and all the birds and flowers are bursting into life and ready to be captured on film again, and I know Dad is ready to get out and about again with his camera.


As mentioned before I have used papers from the the papers kits Sarah sent out monthly. Sarah has some camera themed digi stamps available here also that would tie in nicely.

I have embellished the layout with little accents (sequins and cork shapes) that I've collected along the way from Sarah's fabulous selection of embellishments, found here. Then used the block alpha stamps to stamp the 'May' tag.

How are your calendars coming along, we'd love to see if you are willing to share.

Supplies


Tuesday, 17 March 2015

Create a Calendar - April (Claire)

Hi all!

I'm (Claire) joining you today to share with you my next page in the calendar that I'm creating throughout this year.


I stamped and coloured (with Promarker alcohol pens) one of Sarah's Charm street cuties during the week, so I knew I wanted to use her in this project. Searching through my papers I found these two designs supplied to us by Sarah through her collaborations with Die Cuts With a View (DCWV). The colours matched perfectly, and are so vibrant and fun that I thought, worked just right for the month of April.


The papers are gorgeous and have lots of textures and different finishes within the design.


Thank you again for dropping by, keep a look out soon for Jaine and Clare's pages for April.

Supplies Used


Saturday, 7 March 2015

Crafting on a Budget - Sew, it's Mother's Day soon!

Hi there, thanks for joining me (Claire.N)

To continue my little series, Crafting on  Budget, I have created a little card perfect for Mothers Day, that is coming up for us very soon here in the UK.
As in previous posts (the links are here and here), I have used all  supplies i have recommended, and also as previously promised I have included a new set of stamps, Sarah's Zendoodle Fashion Stamps.


Here you can see the materials I have used, again it is a great way to use up the small scraps that may be left on your desk, along with any lengths of ribbon/lace/sequins etc., and its great to get so much dimension and texture on a card.
 Because this is a sewing themed card, it would also be great to use buttons to accent the card too.  The strip of tape measure I have used here is cut from some of Sarah Hurley's design papers, but how about this for an idea....how about using a real tape measure, the little mini ones you get from Christmas crackers (and hang about for ages...in our house anyway!) are absolutely ideal, and add to the authenticity of the theme.


We would love to hear if you are finding these themed posts useful....perhaps you have some papers or embellishments for an absolute age and you can't figure out how to use them? Drop us a note and we'll see if we can help you.
In the mean time, head on over to Nicole's post (link here) from the other day. Nicole is a whizz at coming up with fabulous and inventive ways to use up those odds and ends that are laying about.....I love reading about what she does.

Hope you all have a lovely weekend, see you again soon x

Tuesday, 17 February 2015

Create a Calender - March (Claire N)

Hello, I'm back (Claire N) with you today to share my calender page for March


I used one of Sarah's Large Tiger Butterfly stamp, layered over the top of a watercolour wash on linen cardstock. I created the background wash with dry brushing Distress Ink sprays (weathered wood & tattered rose) onto artists canvas textured cardstock.
I used my craft mat as a palette, and by spraying the ink and mixing slightly I was able to ink up the large Fancy Deco Lattice background stamp and another subtle layer to the background I had created. The advantage of using the inks in this way is the randomness of the print, and perfect colour coordination with the background wash.


 The impression from the butterfly stamp has preserved some of the texture of the cardstock, and gives that slightly faded, vintage feel to the whole piece.

How are your calendars coming along?

Saturday, 7 February 2015

Crafting on a Budget - Introducing colour and texture


Hello, and thank you for joining me (Claire N) again. I am hoping that you enjoyed my last post where I introduced new crafters and cardmakers to a basic list of supplies to get started.
Here is a quick recap of that list.

  • Simple card blanks
  • Free download papers
  • Paper scraps & offcuts
  • Small embellishments & ribbon
  • One stamp set & ink
  • Double sided tape
  • Cutting Stationary (Sharp scissors or craft knife, steel ruler and self healing mat)
 As this title suggests my aim is to show you how to craft on a budget, and therefore the cards I make will 
  1. use the basic supplies (above)
  2. Introduce on new element and I will offer suggestions on what to treat yourself to (more often than not a stamp set)
  3. Challenge myself, and encourage and spur on seasoned crafter's to use up scraps and supplies that have been pushed towards the back of the draw.


So today I have used standard white 6x4 inch card blanks, the sentiment stamp set (from last post), the black ink pad and scraps of the free downloadable dotty paper printed last month.
The items I have introduced this month are
  1. Coloured pencils and felt tip pen- everyone has colouring pencils available, and some may have watercolour pencils (in which case grab a small paintbrush too)
  2. Needle and thread - again another everyday item
  3. Picnic in the Park stamp set by Sarah Hurley - this is a fantastic set to treat yourself to and offers you lots of opportunities to make cards for all occasions and techniques.
Method
  1. Cut a piece of white cardstock to 5.5 x 3.5 inch and draw two feint parallel lines in pencil, between which you can pencil in the word 'hello'.
  2. For those who enjoy stitching, you can take your needle and thread now and stitch the word 'hello' - using the needle to prick the holes first.
    • If you are not a stitcher, I have also made an alternative card for you, showing you that faux stitching with a marker pen is as effective. 
  3. Stamp the flower and leaf stamp, from the newly introduced set, and stamp with the black ink. Stamp also the butterfly with the twirly trail.
    • TIP 1- ink the stamp with the black ink and stamp once on scrap paper, before stamping on the card. This just takes away the intensity of the black.
    • TIP 2 - Look at elements of individual stamps too. To embellish card, ink JUST the twirly trail and stamp randomly over the card.
  4. Colour the stamped images with the coloured pencils. If you have watercolour pencil, you can use a barely damp paintbrush to blend the colour too.
    • TO chow the comparison, I have watercoloured the stitched card. I actually quite like the look of the untouched pencil colour.
  5. Stamp the sentiments in black.
  6. Using a ruler,the same marker you traced the letters with, draw a thin border around the outside edge.
  7. Using double sided tape, add a layer of dotty paper direct to the card blank, before adding the stamped layer.


Thank you so much for joining me today, I do hope I have given you a few ideas, and shown you that you don't (initially) need bundles of supplies to make pretty cards with lovely sentiments.
If you are new to the craft, we would love to see what you have made.

See you again next time x


Thursday, 15 January 2015

Create a Calendar - February (Claire N)


Morning, thank you for joining me (Claire N) today as I share with you my next page in this mini series where we are creating a calendar.
February, traditionally is portrayed as the month of Valentines Day, but I wanted to do something a bit different. 

As I stand at my kitchen window, seeing what I can see out in the garden, I find myself watching our resident Robin bravely defending his territory from the fencing panels around our oil tank. They are fabulous feisty little birds either that sit alert ready to chase off intruders, or plump and fluffed up against the cold. Our little character sits atop his fence panels alongside the evergreen Ceanothus plant (that unusually already has a couple of blue flowers in bloom....in January!).

So it is that scene that I wanted to create, using Jaine's Robin's stamps, originally designed for Christmas, so I was conscience not to make this piece look festive.


This month again I have prepared this page for February for 2016, so that when I have made Decembers page, I have a full calendar ready for the following year, hope you will continue to join us all the way too.


Materials used
Calendar template
Calender component stamps
A4 white stamping card
Distress Ink Markers - Vintage Photo, Barn Door, Peeled Paint


Wednesday, 7 January 2015

Crafting on a Budget - A New Series - Sentiment Cards

Hello and welcome back  to the 365 blog - with all festive supplies stashed away again for another 11 months, I have turned my thoughts back to these monthly regular posts.
I (Claire N) have decided to run my next 12 monthly posts (on the 7th of each month) with a theme, so I hope you enjoy and follow along.

The main theme I'll be working to, is crafting on a budget. I think there will be something for everyone, maybe you have decided the New Year is the time to start crafting, or you have decided (as a crafter) that this year you will be more economical with your supplies and are determined to use all your scraps before buying new paper pads.

                                                                            ******

All the cards made share the fact that the main focal image is actually the sentiment, stamped onto the labels that can be downloaded from Sarah's website.


So, to begin, I have made a set of cards, using 
  • Simple card blanks - a pack of 50 card blanks & envelopes can be bought for about £6.50 (13p per card & envelope). You may be able to find smaller packs that cost less!
  • Free download papers - Sarah has a couple of sets of free download papers
  • Paper scraps & offcuts - Crafters  will have endless boxes, but as a beginner, save packaging/labels etc, if a pattern strikes you and the paper/card is in a fairly good condition keep it! If you buy from Sarah's shop, sometimes the packaging includes some lovely teal blue tissue paper. ideal to add to cards. But if you don't have any, you can download some printable papers from Sarah's shop.
  • Small embellishments & ribbon -
     again seasoned crafter will have plenty. But as a beginner, use buttons laying around your home, salvage sparkly/pretty embellishments from other greetings cards. How about looking at your clothes, have any of your jumpers got lengths of ribbon in the shoulders that get in the way? - snip it out and use on your cards (I do it all the time!)  Alternatively Sarah has grab bags of embellishments in her shop ranging from £3.50 to £5. The cards pictured show a representation of the some of the embellishments in these bags.
  • One stamp set & ink - For the beginner, a well chosen stamp set will be invaluable and something to use again and again. I have thought for you and if you can only stretch to one set, I would suggest a set of Sentiment Stamps - suitable for all occasions and people. Sarah's set here is £5.99. To keep costs down initially, I would recommend just one Memento ink pad in black, ranging in price from £1.01 to £2.74
  • Double sided tape - a good adhesive is key, and with experience you will find your own preference. But to begin I would recommend this really strong double sided tape for £2.63
  • Cutting Stationary (Sharp scissors or craft knife, steel ruler and self healing mat) - Use what ever you are comfortable with initially. 
To sum up, if you are a beginner, for an initial outlay of £20 (an additional £12.75 will get some optional extras) you will have more than enough supplies to make these 5 cards, and more.

First Card

Card is 3.75" square, backing paper is 3.5" square, red layer behind sentiment is 2"x 1.25"

For Beginners - The sequence of events stamping your sentiment.
Peel the stamps from the plastic sheet, and put onto an acrylic block. If you don't have one use anything clear and plastic, for example a plastic ruler, the lid of a CD case etc.

For Beginners - on the reverse of each cut element line with the red double sided tape (top).
The lower photo shows the order in which the elements should be applied to the card.

Second Card

I've heard that colour blocking is fashionable in clothes, well I wouldn't know about that LOL! but it is a good look to create a card for a teenage boy.

For Beginners (card is 4.75" square)- Just wanted to show how to finish the card with a small few stamped accents, using both the stamp set and inks listed at the top of the page.
The stamp set is so versatile, and the finishing touches really 'jazzes' up your project.

Third card

Do you remember paper weaving, it is a perfect way to use up, those smaller scraps of paper and add some interest to a small card.


For Beginners - How to compile the card which is 3.75" square

Fourth Card

A very simple card, but clean and effective and lets you use 2" squares of co-ordinating paper as a backdrop to the stamped hearts and sentiment.


Fifth Card

This is a bold card with striking colours, and a bit of dimension from the 3D glittery heart. The ribbon has been recycled from one of my lightweight summer tops.


For Beginners - this card is 4.75" square, with the main pink backing paper being 4.25" square.
To keep things simple the dimensions of the other elements isn't essential, you can cut the pieces to the size that looks good for you. This craft is all about personal taste and that is what adds the uniqueness to each piece you create.

I hope that I have been able to encourage those new to this craft to give it a go. I wanted to show you do not need to spend too much on materials, to be able to create something fun and vibrant, for all number of occasions for both males and females. Making the right initial purchases is key, and if you are able to follow me through the months I will start adding in further supplies and also showing you how to get the most out of them too.

For you seasoned crafters, who have persevered to this stage in the post (thank you LOL), I hope I have given you a few ideas on how to use use up those scraps of paper, and also how going back to the basics of card making, and focusing on sentiments, can produce sweet little fun cards.

All of us with this hobby want to get the most out of the supplies we buy, and over the coming months I hope to be able to demonstrate different style of cards that can be made from one stamp set, or paper set etc. 

See you again next month, and I've introduced theme, I promise the next post won't be such marathon..hehe.

Claire N x


Supplies List