Showing posts with label Jaine. Show all posts

Saturday, 20 June 2015

July Calendar page by Jaine

It's that time again, with Summer well and truly here, for school to finish. Well, almost anyway.

I keep hearing "School's out for summer" in my head!


Of course I'm a month ahead with my calendar as usual but it'll creep up before I know it. We're already making plans for trips, visits and holidays.


This time I've gone for a more scrapbooky (is that a word?) feel for July using some of the journaling cards and washi tape from the latest A Few Of My Favourite Things kit and layered them onto my background which I've painted and randomly stamped with a couple of my background stamps, Fireworks and Pebbles.  I've also used the 'Yay' from the Everyday Sayings stamp set.


I hope you're keeping up with us here.

What are you planning for summer?

Jaine x

Tuesday, 9 June 2015

All at sea.


I thought today I'd show you a quick card made using two of my stamp sets, Beside the Seaside and Don't be Crabby.

When I was young, my parents nearly always took their holiday at the same place in North Wales, which as a child, I found very tedious and longed to go on exciting holidays like I thought a lot of my friends did. It's funny though how you see things and now looking back on those times it wasn't boring at all. In fact I remember lots of fun times there.

These memories sparked the ideas to design these two stamp sets and it seemed rather appropriate to create this card to send to my Dad for his birthday coming up so he can remember  the good times we had.

The background is a simple watercolour wash and each element was fussy cut out and stuck down on top. It seems a fiddly thing to do but with a small pair of sharp scissors it's not too difficult.


I hope it brings back some memories for you too.

Jaine x

Wednesday, 20 May 2015

Geat ahead for Fathers Day


Fathers Day is not far away and it pays to get ahead of yourself and start making beautiful and meaningful things so you're not caught out.

I've made a couple of little presents and a matching card all from the same preprepared background sheet and they're very easy to do too.


All you need is a sheet of watercolour paper, (I use 300gsm all the time). Spray it with two or three similar colours first then let it dry and spray a contrasting colour through a stencil.  To add a bit more to the background I stamped randomly with my Pebbles background stamp and you'll see I'm not using a block either. This adds to the randomness of the stamping.


 I was able to cut up enough to make these three projects with a bit left over for another day.

To finish the card I've stamped the seat from my In the Garden stamp set 
onto a piece of Kraft card, punched a hole and added a grommet. A bit of twine wrapped around the card was enough to make it look finished off but not too femine I thought.


For my second project, I turned a strip of background paper into a little notebook. The inside sheets are just cut from plain copy paper and held in place with the brad so they can be pulled out easily.


Again, I've used stamps from In The Garden  to decorate it as it could be used for Dad's garden notes.


My third project is another simple matchbook design but inside I've added a few glassine bags with a staple to add tags with little promises typed on them.


In the past my children have been very proud of the little promise tickets they've given as gifts. It means so much more than a shop bought present. Get them to write their own promises on the tags they'll be so happy to think up little things.


Have fun creating background sheets and see how many projects you can get out of it.

Jaine x

Tuesday, 19 May 2015

June Calendar page

We are racing through the months which is a little bit daunting but never the less I have to remind myself I am a month ahead with my calendar page.

Here we are at June already and June is my wedding anniversary month. As usual I've gone for the scrapbook layout style of documenting.


To create my page I've used some of my monthly kit club journaling cards which I'm so happy to say are coming back so check out the details of how to subscribe.


I hope you liked my calendar page.

Jaine x

Saturday, 9 May 2015

An easy and fun journal page.


I have a hand made 15 x 15cm journal which I keep for small, quick journal pages either trying out a new stamp or a doodle but mostly for times when I really don't feel like too much messy play. (I know amazing for me!)


If you want to create a page but don't want all that painty-messy stuff then use a piece of patterned paper as your base. Here I've used a cute piece from DCWV which I chose especially as it had the leaf pattern across it.

I stenciled some texture paste through a home made stencil and added a few bits of washi tape here and there. I say bits, I'm really into tearing it into small strips at the moment.


Once the paste had dried I mixed up some of my Shin Han paints (coming soon to Sarah Hurley) into this gorgeous turquoise colour and painted over the circles.


To further add to the background interest I stamped over randomly with the Ledger background stamp, a few mini flowers from the Doodle Home set and  the scalloped border too. I also stamped the houses and tree onto water colour card, painted them and cut them out.


I layered over my elements and decided to add some finishing touches with a white painty pen.


This is a really easy fun project for someone who wants to create a mixed media journal page without too much mess.


Have a good weekend.

Jaine x

Sunday, 19 April 2015

May Calendar page

I'm finding it hard to come to terms with the fact that the first quarter of the year is over already. Before I know it Summer will be here. I'm working a month ahead of course on my Calendar so I'm prepared and that might have something to do with it.


I built everything up on a pre-sprayed background and decided as it's the birthday month of my middle daughter, she would be my focus.

I've used some journal cards from previous monthly kits and added a little detail into the top one by cutting out an arrow to show the card below.  I also used one of my own stamps to stamp directly onto the photo.  Don't be afraid to stamp or add details to photo's, it adds to the fun of the image.  I hand drew and cut the arrow and stars for a fun touch.


Happy crafting to you.

Jaine x

Thursday, 9 April 2015

Stamping on fabric.

As the sun was shining, the covers came off the terrace furniture and I felt like brightening things up a bit, so I made this cute plant pot stick in about an hour. It was that quick.


To make one of your own you'll need a piece of plain white cotton or calico, twice the width of the butterfly (I'm using the Large Monarch Butterfly stamp ).

  Instead of using ink I decided to see how paint would look. This stamp has a large surface area which is perfect for adding colour onto. I used Shin Han water colour paints (soon to be found at Sarah Hurley ) straight from the tube and even though it's water colour paint I knew I wasn't going to allow my butterfly to get wet. Of course If you're worried about it you can equally use a water proof ink or acrylic paint. I used a paintbrush and blended the colour directly on the stamp. I was doing this in a sunny window so needed to give it a quick mist before stamping as some of the paint had started to dry.


I stamped straight down onto the calico and the print was much more vibrant than if I'd used ink. You NEED to wash your stamp straight away otherwise the paint will dry in the holes.


After doubling over the fabric, I cut around the butterfly. A piece of wire sandwiched in between the layers acts as the antennae, then I sewed around the two butterfly pieces leaving a small hole for stuffing.


To give my butterfly some dimension I stuffed it with some wadding using a bbq skewer then closed up the hole.


Finishing it off I put a little glue on the tip of the bbq skewer and pushed it into the body, I tied some ribbon around the stick and decided to cut shorter my antennae. I also fluffed up the edge to make it more tattered looking.


You could make your own stamping onto card instead of cotton or if you don't like sewing, back some cotton with card, stamp then cut out the butterfly.

How about bunting butterflies? Mmmm maybe I'll try that!

Jaine x

Thursday, 19 March 2015

Create a Calendar, April.

April for me is all about the birds nesting and raising their young in the nest box we have up in the tree. I also have one of those houses on a pole which I was told would just be a feature in the garden and never be used as an actual nest box but despite being metres away from a busy main road and not too high off the ground they do actually nest in it.


That was the inspiration behind my stamp designs "Tweet Tweet" and "Nests are Best" both of which I've used here.


Do you have nest boxes in the garden?

Jaine x

Monday, 9 March 2015

Bookmark - what's a bookmark?

It sounds rather dramatic but soon these little things will become totally redundant. Bookmarks, that's what I'm referring to. As more and more of us read everything from books to the newspaper on our e-readers and tablets, the humble bookmard will become a thing of the past. Just think a whole new generation of people growing up having never used one.

Well I want to put that right and as this new trend for filofaxes and agenda's is taking off, why not make book marks for them?


I stamped the girly from Charm Street Cuties Flower Girl stamp set onto watercolour card with a waterproof ink.


I stamped her a second time on a post-it note and just cut around the head so I could stamp the bunting behind her.


Not content to stop there, I stamped the bunting on a post-it and cut around the right hand end stamping the cloud.


Then guess what? Yes I stamped that too on a post-it and masked it off so I could stamp a second cloud.


With all the masks taken away this is what she looked like.


Now for the colour. I chose to add watercolour paints to her just because I love the look so much.


I trimmed it into a bookmark size and added the word Smile with alpha stickers.


To finish off, I backed it with a piece of card to neaten the back and add a border then ran it through a laminating machine. I rounded the corners to make them a bit more friendly and less sharp and added a grommet and ribbon at the top.


I love it in my agenda and it's guaranteed to make me smile each time I open my page.

Take care and keep the bookmark alive,

Jaine x

Thursday, 19 February 2015

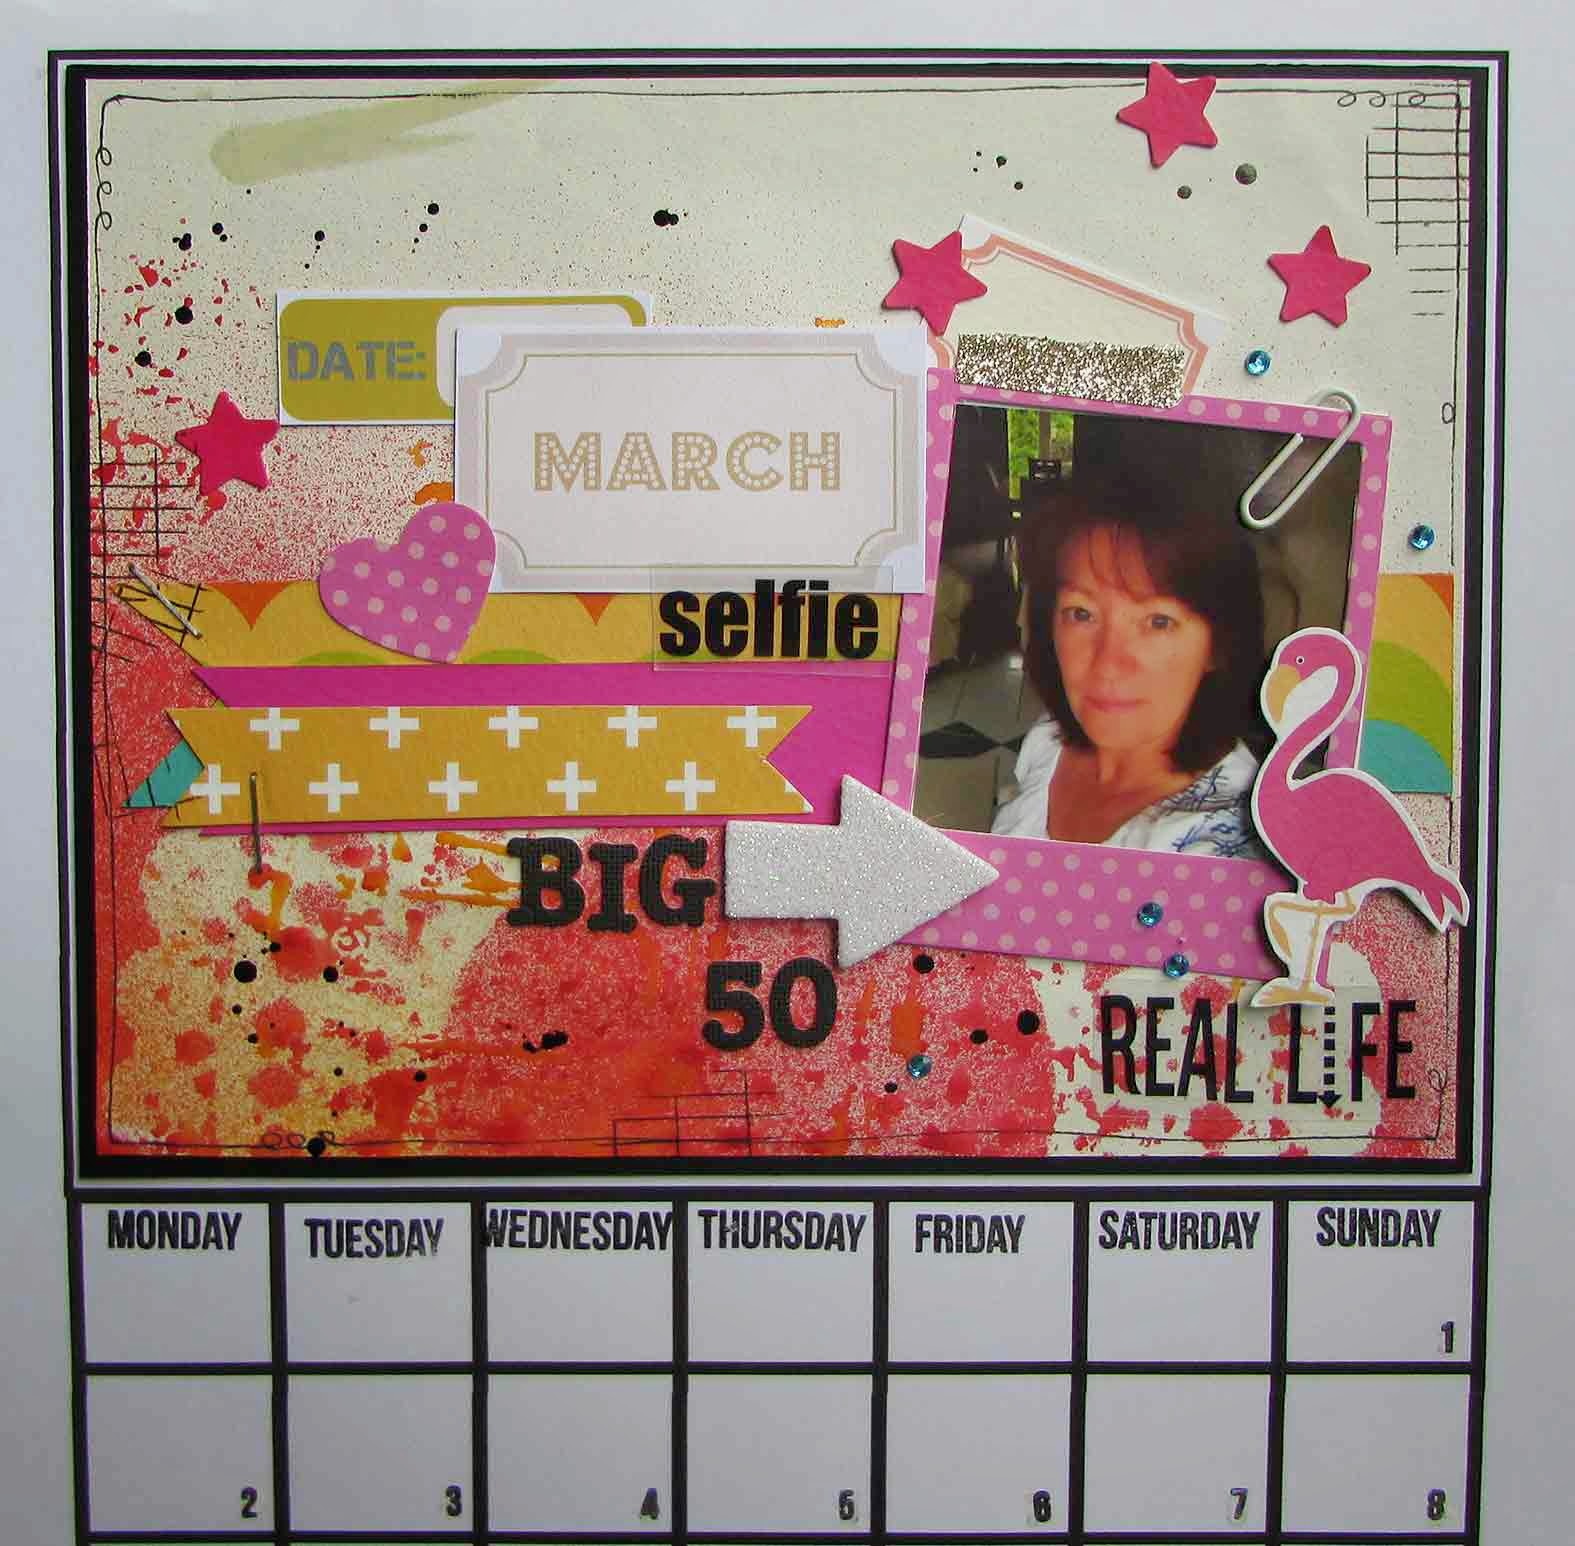
March Calendar

Oh March, this is my month.

This year it's extra special though as it's my big birthday year. That big fat fifty. They do say it's the new forty though so that's some sort of comfort. A good friend and I have decided to go hiking in Austria to mark the occasion but later in the year when it's warmer and it'll also be her fiftieth too.

I decided to indulge myself in a selfie page for my March page. Adding a photo to a calendar layout makes the month a bit more personal I think so most of my months will be done in this way.


I'm a bit of a mad march hare anyway, so a riot of colour was rather appropriate. Using offcuts to layer colour over a sprayed background along with some Documented 365 and Real Life Daily stamps. 

I've treated the whole thing a bit like a mini scrapbook layout.

I look forward to bringing you a new page next month.

Jaine x

Saturday, 14 February 2015

Altered agenda

There's a real trend right now in altering agenda's and the good old Filofax is back. Actually I've never stopped using one, I'm a real 80's babe. I love the latest trend though in personalizing it and treating each day/week like a mini pocket page planner.

I was overjoyed when I found this planner in my local store. It's just what I was looking for with clear pockets to hold things and spaces for notes etc. but it needed the personal touch.


That's where I turned to my Sarah Hurley supplies, papers, stamps and embellishments. I had great fun in decorating the front and you may think  'that's not going to last too long knocking about in her handbag', the book does come with a clear plastic front cover which I flipped over for the photo.


My book already came with a band around it but it would be so easy to add one to your own book. I love the page tabs hanging out marking sections.


I used my Real Life Daily stamp set throughout.


Are you using a planner or agenda?

Jaine x

Wednesday, 28 January 2015

Make your cards pop!

I'm not a huge fan of 3D layered cards I will admit that but occasionally I will use it just to give an image a little bit of a lift.

This particular card I made for someone special and I really wanted the image to 'stand out' as it were so I applied a few tricks to help it do just that.

I used my own stamp set "How's the weather" (who had one of those umbrella's?) and layered it up.


 I stamped the image once onto white card then again onto some coloured and patterned card. I think the secret here is to get in as many details as possible so I stamped and cut out a pocket and the gloved hand. They're tiny but worth the trouble.


 I rolled the pieces around my tube of Pritt glue to get a nice curve on them and coloured in the legs and puddle before layering everything up.


I made good use of my grey alcohol marker and coloured in the shadows. I think the grey is my favourite as it's so versatile.


Here you can see the dimension once everything was layered together.  I also added some glossy accents to the wellies and umbrella handle.


 I hope you like it.


Jaine x