Showing posts with label Calendar. Show all posts

Saturday, 20 June 2015

July Calendar page by Jaine

It's that time again, with Summer well and truly here, for school to finish. Well, almost anyway.

I keep hearing "School's out for summer" in my head!


Of course I'm a month ahead with my calendar as usual but it'll creep up before I know it. We're already making plans for trips, visits and holidays.


This time I've gone for a more scrapbooky (is that a word?) feel for July using some of the journaling cards and washi tape from the latest A Few Of My Favourite Things kit and layered them onto my background which I've painted and randomly stamped with a couple of my background stamps, Fireworks and Pebbles.  I've also used the 'Yay' from the Everyday Sayings stamp set.


I hope you're keeping up with us here.

What are you planning for summer?

Jaine x

Wednesday, 17 June 2015

July Calendar page


Hi there!

It is that time again for me (Claire N) to share the next page of the calendar that I, Jaine and Clare are all creating this year.
In December we will all collate our pages and each blog our entire calendar, and it will be so intriguing to see how different all three will look.


Today I have created my page for July. I have used the new papers from Sarah's re launch of her 'A Few of My Favourite Things' kit. I'm so pleased Sarah has decided to bring these kits back because firstly, I was running out of paper, and mainly because they are such beautiful quality, and I really do love the colour palettes that Sarah chooses. To definitely secure a kit you can subscribe to a delivery of a wonderful box of goodies every two months, or otherwise pop into the shop to see if there are a few kits available to buy on a single basis.

 To find out more you can follow this link


So onto my page, I decided to layer some of the new papers together, the colours of which remind me of ice-cream. I also chose a selection of stamps that reminded me of summer and holidays, and fitted into the ice-cream scheme. I stamped the images onto papers from the kit also so they co-ordinated perfectly.


Thank you very much for joining us today, I'm certainly in the mood for summer now and hope you are too.
See you again soon.

Supplies used

A Few of My Favourite Things Monthly Scrapbooking Kit contains scrapbooking paper, journaling cards, cardstock and a stamp
'A Few of my Favourite Things' May kit
Expedition stamp set
Doodle Home Stamps

Odds & Ends Stamp Set
Small square acrylic stamping block
3-in-1 craft glue

Tuesday, 19 May 2015

June Calendar page

We are racing through the months which is a little bit daunting but never the less I have to remind myself I am a month ahead with my calendar page.

Here we are at June already and June is my wedding anniversary month. As usual I've gone for the scrapbook layout style of documenting.


To create my page I've used some of my monthly kit club journaling cards which I'm so happy to say are coming back so check out the details of how to subscribe.


I hope you liked my calendar page.

Jaine x

Sunday, 17 May 2015

Create a Calendar - June (Claire)

Hi!
I'm back with you today (Claire N) to share the next page of my calendar with you. I am onto June, and I have included a reminder for Father's Day in my design.


I havn't included step by step instructions, because today my thought process in this design sort of developed as I worked. I'm sure that many of you also have sat down at your desks without a clear idea of what to make. The best thing to do in these times is to reach for your favourite coloured papers, perhaps favourite stamp sets, and from there it will flow organically.


I have photographed how I started out, so I can talk you through a little of my thought process.
  •  I knew I wanted to included the three smaller pieces of white card (to match previous months designs see LO's for february & march). 
  • I knew I wanted to include elements from Sarah's Curio Stamp set, so I stamped them with Memento ink onto white card so that I could colour them with alcohol markers to match when I needed them.
  • I had to incorporate the wording, so I stamped them using Sarah's Block Alpha stamps, again ready to cut out as required (You will notice there are two 'y' at the end of day. I restamped as the first wasn't a perfect image)


With the elements of my design listed, planned and laid out, I hope that can now see how my design came together. 
It is perfectly fine not know how your design will turn out when you initially sit down to create. There are days when you need to re arrange elements, move them about, and even discard and replace with new ones if necessary. These are the days that you can just sit, have fun and indulge yourself in all the time it takes for a creation to happen.

Enjoy, thanks for popping by today. 

Supplies used
Curio Stamp set
Block Alpha stamp set
Memento Black Ink
Sarah's Kit Club Papers

Sunday, 19 April 2015

May Calendar page

I'm finding it hard to come to terms with the fact that the first quarter of the year is over already. Before I know it Summer will be here. I'm working a month ahead of course on my Calendar so I'm prepared and that might have something to do with it.


I built everything up on a pre-sprayed background and decided as it's the birthday month of my middle daughter, she would be my focus.

I've used some journal cards from previous monthly kits and added a little detail into the top one by cutting out an arrow to show the card below.  I also used one of my own stamps to stamp directly onto the photo.  Don't be afraid to stamp or add details to photo's, it adds to the fun of the image.  I hand drew and cut the arrow and stars for a fun touch.


Happy crafting to you.

Jaine x

Friday, 17 April 2015

Create a Calendar - May (Claire)


Good Morning!

I'm (
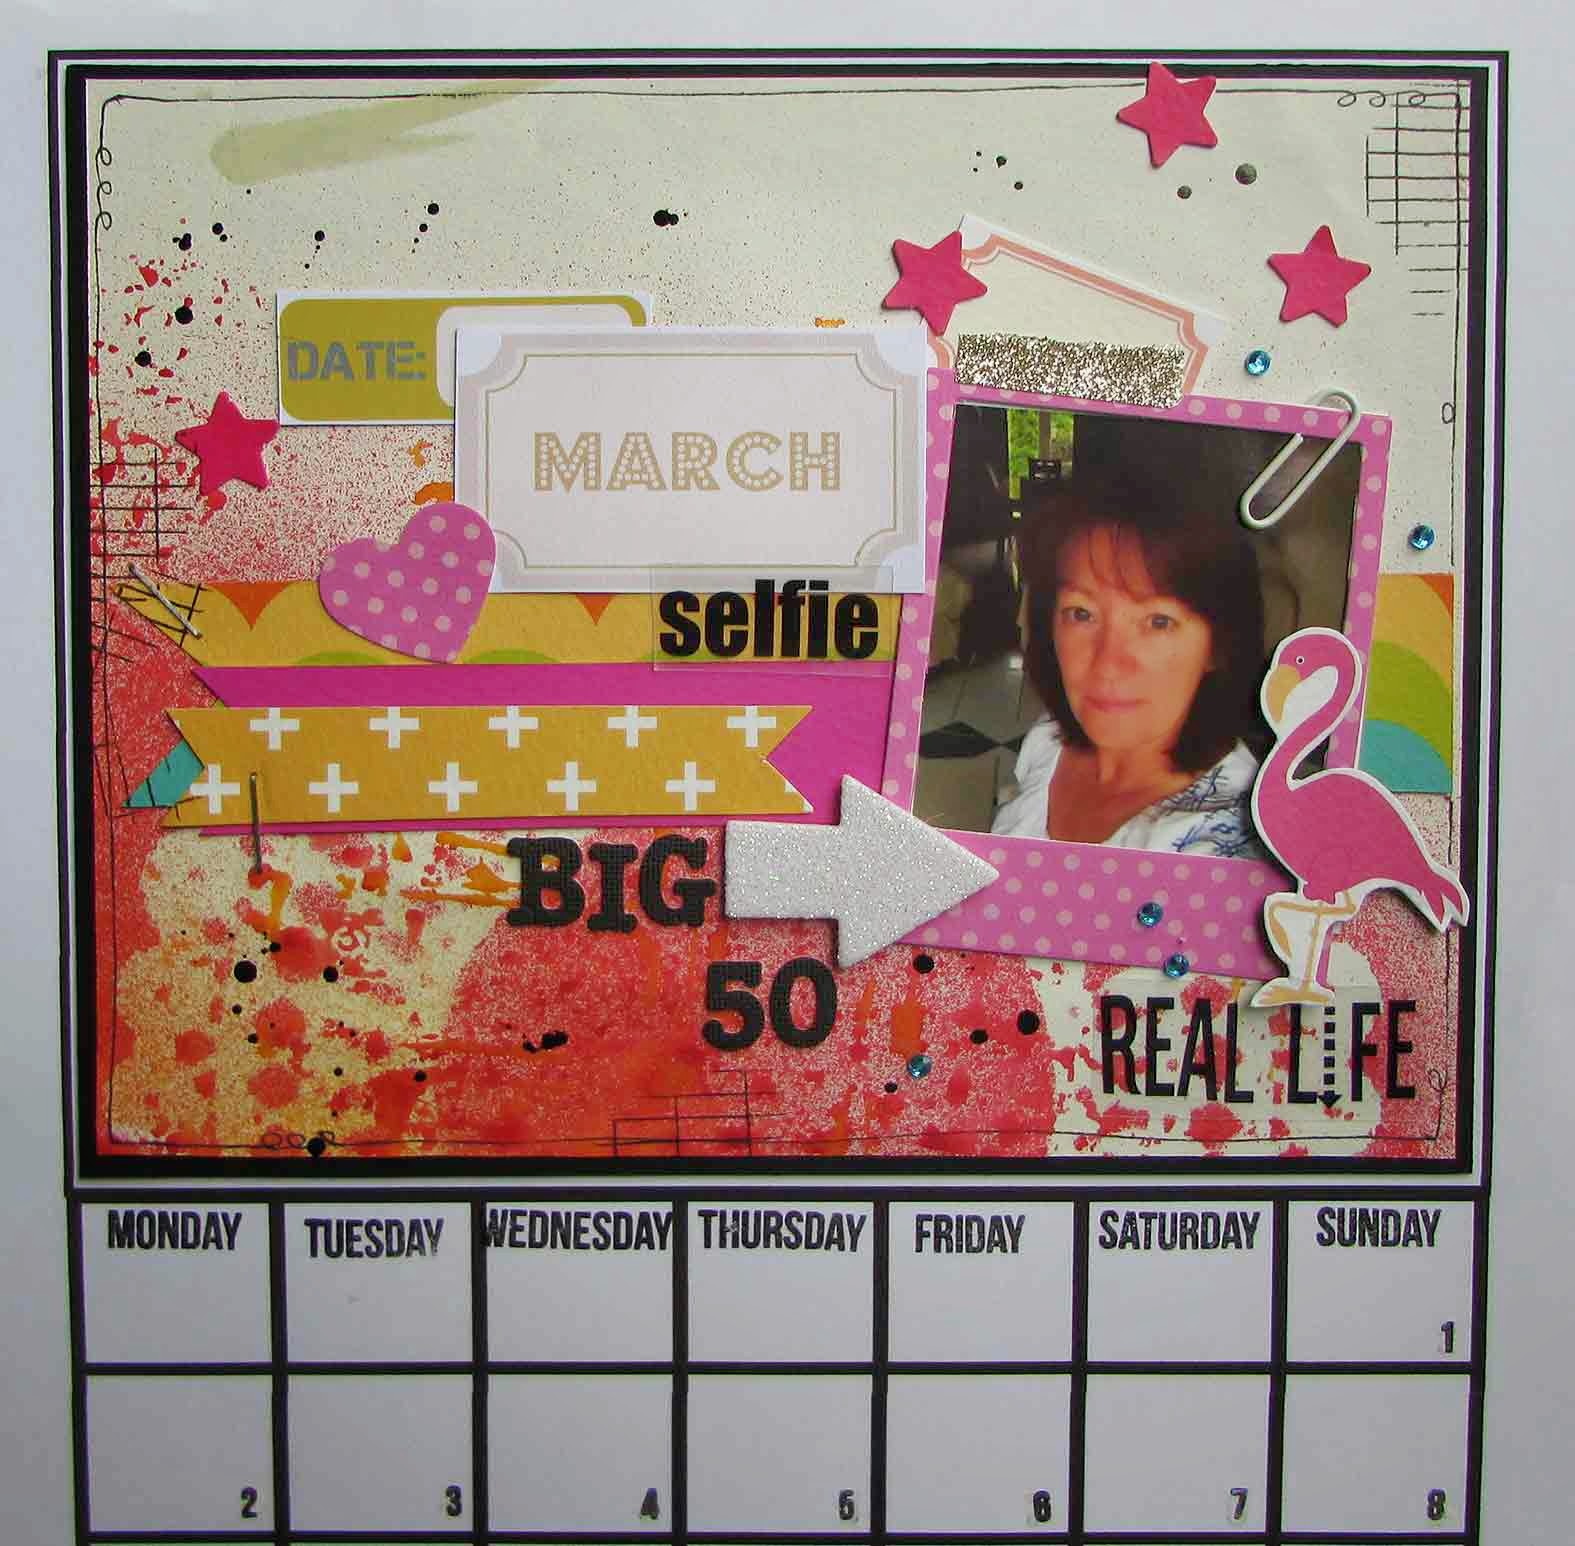
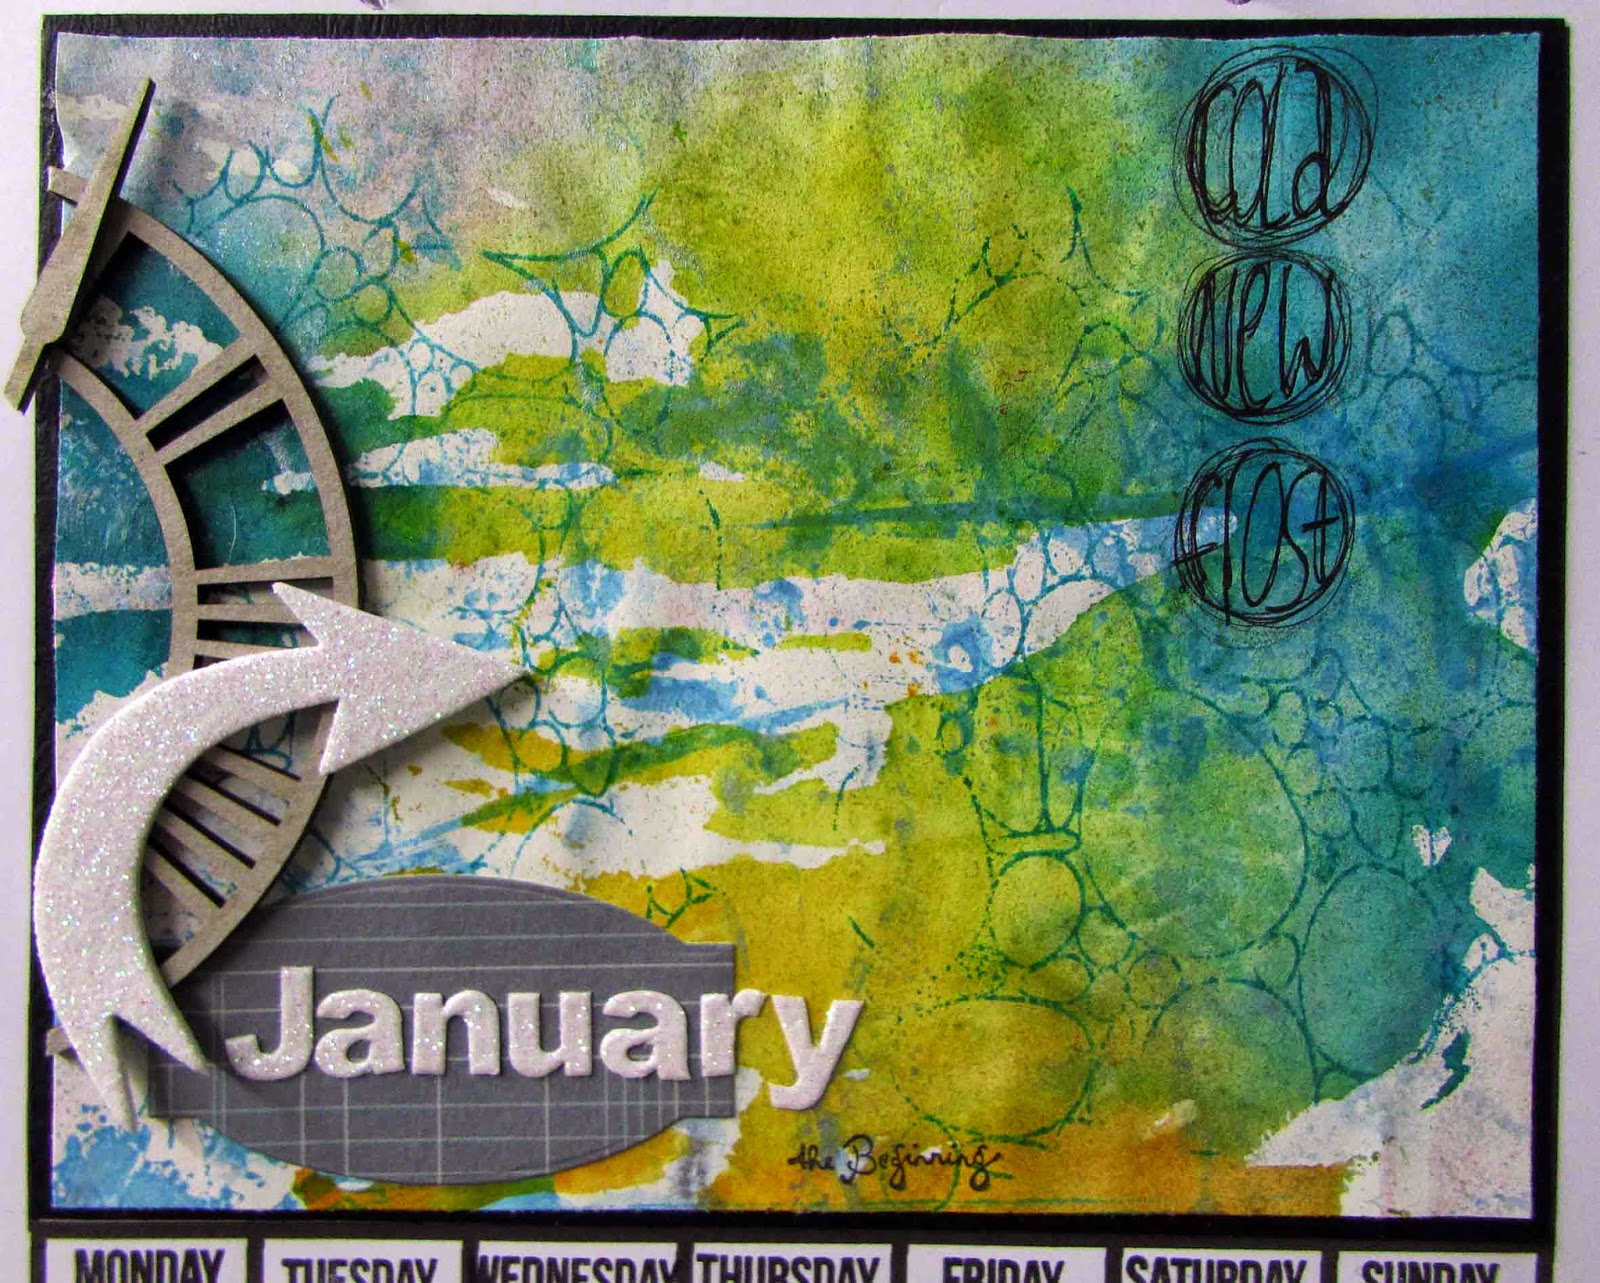
Claire N) sharing with you today my calendar page for May. I'm really pleased how this project is coming along. We are nearly half way through, and even now I am enjoying looking back over the last months to see my mood and style that has been captured.
I am creating the entire calendar, firstly to be used during 2016, and also with someone in mind to gift this too.


My inspiration for this May layout, was birthdays. May is the month of my Dads birthday, a talented amateur photographer.  I have been coveting these papers from Sarah's 'A Few of my Favourite Things Kits' from (literally) ages ago, yearly last year I think......hehe!  (keep a check on this link here, there may be some exciting news on the way soon, if you loved and miss these kits)
Do you do that, just keep papers without using them? I do, I get just as much pleasure from looking at them and re-arranging them, then putting away again.

 Anyway, I was compelled to use them today because they are absolutely perfect for any photographer. May is the month when Spring is in full swing and all the birds and flowers are bursting into life and ready to be captured on film again, and I know Dad is ready to get out and about again with his camera.


As mentioned before I have used papers from the the papers kits Sarah sent out monthly. Sarah has some camera themed digi stamps available here also that would tie in nicely.

I have embellished the layout with little accents (sequins and cork shapes) that I've collected along the way from Sarah's fabulous selection of embellishments, found here. Then used the block alpha stamps to stamp the 'May' tag.

How are your calendars coming along, we'd love to see if you are willing to share.

Supplies


Thursday, 19 March 2015

Create a Calendar, April.

April for me is all about the birds nesting and raising their young in the nest box we have up in the tree. I also have one of those houses on a pole which I was told would just be a feature in the garden and never be used as an actual nest box but despite being metres away from a busy main road and not too high off the ground they do actually nest in it.


That was the inspiration behind my stamp designs "Tweet Tweet" and "Nests are Best" both of which I've used here.


Do you have nest boxes in the garden?

Jaine x

Tuesday, 17 March 2015

Create a Calendar - April (Claire)

Hi all!

I'm (Claire) joining you today to share with you my next page in the calendar that I'm creating throughout this year.


I stamped and coloured (with Promarker alcohol pens) one of Sarah's Charm street cuties during the week, so I knew I wanted to use her in this project. Searching through my papers I found these two designs supplied to us by Sarah through her collaborations with Die Cuts With a View (DCWV). The colours matched perfectly, and are so vibrant and fun that I thought, worked just right for the month of April.


The papers are gorgeous and have lots of textures and different finishes within the design.


Thank you again for dropping by, keep a look out soon for Jaine and Clare's pages for April.

Supplies Used


Thursday, 19 February 2015

March Calendar

Oh March, this is my month.

This year it's extra special though as it's my big birthday year. That big fat fifty. They do say it's the new forty though so that's some sort of comfort. A good friend and I have decided to go hiking in Austria to mark the occasion but later in the year when it's warmer and it'll also be her fiftieth too.

I decided to indulge myself in a selfie page for my March page. Adding a photo to a calendar layout makes the month a bit more personal I think so most of my months will be done in this way.


I'm a bit of a mad march hare anyway, so a riot of colour was rather appropriate. Using offcuts to layer colour over a sprayed background along with some Documented 365 and Real Life Daily stamps. 

I've treated the whole thing a bit like a mini scrapbook layout.

I look forward to bringing you a new page next month.

Jaine x

Tuesday, 17 February 2015

Create a Calender - March (Claire N)

Hello, I'm back (Claire N) with you today to share my calender page for March


I used one of Sarah's Large Tiger Butterfly stamp, layered over the top of a watercolour wash on linen cardstock. I created the background wash with dry brushing Distress Ink sprays (weathered wood & tattered rose) onto artists canvas textured cardstock.
I used my craft mat as a palette, and by spraying the ink and mixing slightly I was able to ink up the large Fancy Deco Lattice background stamp and another subtle layer to the background I had created. The advantage of using the inks in this way is the randomness of the print, and perfect colour coordination with the background wash.


 The impression from the butterfly stamp has preserved some of the texture of the cardstock, and gives that slightly faded, vintage feel to the whole piece.

How are your calendars coming along?

Monday, 19 January 2015

February Calendar page - Jaine


It's my turn again to show my calendar page and this one is for February.

Two of my girls have a birthday in February so I wanted to create February's page using a photo in a scrapbook style. I turned to some of my pocket page supplies to put it together and I'm pleased with how it looks.

I'll be mixing photo pages and journal pages as I go along depending on what the month means to me.

Here's the photo half.


Happy creating,

Jaine x

Thursday, 15 January 2015

Create a Calendar - February (Claire N)


Morning, thank you for joining me (Claire N) today as I share with you my next page in this mini series where we are creating a calendar.
February, traditionally is portrayed as the month of Valentines Day, but I wanted to do something a bit different. 

As I stand at my kitchen window, seeing what I can see out in the garden, I find myself watching our resident Robin bravely defending his territory from the fencing panels around our oil tank. They are fabulous feisty little birds either that sit alert ready to chase off intruders, or plump and fluffed up against the cold. Our little character sits atop his fence panels alongside the evergreen Ceanothus plant (that unusually already has a couple of blue flowers in bloom....in January!).

So it is that scene that I wanted to create, using Jaine's Robin's stamps, originally designed for Christmas, so I was conscience not to make this piece look festive.


This month again I have prepared this page for February for 2016, so that when I have made Decembers page, I have a full calendar ready for the following year, hope you will continue to join us all the way too.


Materials used
Calendar template
Calender component stamps
A4 white stamping card
Distress Ink Markers - Vintage Photo, Barn Door, Peeled Paint


Sunday, 21 December 2014

Create a Calendar - January

Hello, it's my turn (Claire N) to share with you the calendar page I have created for January.
This has been on my wish list of projects to do for a very long time, but never actually got around to doing. So when Sarah asked us for our ideas and plans for the blog in 2015, it seemed the perfect opportunity to begin.


Using Sarah's downloadable template, I have created a scene reminiscent of January. This first month of the year can tend to be flat and grey, but in crafting grey is a fabulous colour to pair with vibrant colour. So here I have added an injection of  yellow to bring a bit of sunshine to the scheme.


Using a calendar template, that will be available via Sarah Hurley's website, I have created the first month, January.

We will have a Pinterest board where myself, Clare, and Jaine will post our monthly pages, and we would love for you to join in too.

We will post our pages each month regularly to build up an entire calendar for you.


I will be working a whole year in advance and preparing this as for 2016, and will be perfect to give as a gift.

Materials
Sarah's papers from monthly kit club.
Sarah's calendar stamps

Saturday, 20 December 2014

2014 Calendar January.


Hello it's Jaine here again and I'm really excited and happy to be a part of this new project for 2015. It's great to get my teeth into a new project and I'm really hoping that my teamies Clare, Claire and I will motivate you to join in too.

If you'd like to join us Sarah will be offering the calendar blank as a download along with the co-ordinating stamp sets.

 I've gone ahead and printed all twelve of my blank sheets ready for filling in. I've added my dates in manually with the new Calendar stamp set and added a journal page at the top. I've since added a couple of holes at the top of all of my pages and slipped in binding rings and mounted it onto a flat canvas so I can hang it up and flip the pages as I go.


For my artwork, I've created a background with spray inks and used my new background stamp Pebbles which I'm really excited about using, and added some die cut elements which I've layered up on the left. I added a few little stamped images too on the calendar itself for dates which I need to remember.


It's a lovely project to do in one go, adding photo's maybe to all the pages and to give as a gift or create artwork as you go along to keep for yourself. Once you have the download and stamps you can create as many as you like and continue year after year.


We'd love to see how you work with your calendar download.

Jaine x

Saturday, 1 November 2014

Make a date!

Hello, it's Carol here today to share something completely different. Who can believe it is the first day of November already? It will be Christmas before we know it, and I am trying to get more organised this year(though I think we all say that every year!)

Today I will be showing you how to make a calendar that is an ideal wee gift for someone at Christmas. I picked up a pack of calendars on my last visit to the craft shop and was really stuck with what to do with them, so I visited Sarah's Online Silhouette Store and had a bit of a think and here is what I came up with.


1  Select a file to use, I picked the Shattered Triangles Background.  Place it onto your work space, highlight in then go to the "Scale Window", click on "lock aspect" and type in 5 in the W box. I made mine 5x5", but you can make it any size you want. Then duplicate it 3 times, and place into the corners of the mat.  You can do as many or as few as you like, I opted for 4 as I wanted 3 colours that would co-ordinate with my kitchen, and one frame. Put 4 pieces of paper just under 6x6" onto your mat, load it into your Cameo, and off you go.


2 Get a piece of thick card or grungeboard and cut it to 5x5", cover the edges with co-ordinating Washi tape, I used Silver Washi Tape. Pick another colour of card to work with the colours you have already picked and cut it to 5x5" then stick it onto the card.

3 Carefully remove the colour of the cut out you want as the frame from the Cameo mat, and stick it onto the base. I found the easiest way to do this was to cover the back of my hand with PVA and place the frame onto it. 


4 Have lots of fun picking which colours you want to fill parts of the frame, I used a Quickie Glue Pen to stick them in as it gets right into the corners of the triangles.


5  Foam mount the calendar onto the finished background.

6  Pop some magnetic tape onto the back of it, and voila you have a calendar for your fridge. 

Thanks for popping by today and I hope this will inspire you to use your Cameo for Christmas gifts.